How to Check Available Ports in Windows 10
When dealing with certain apps and processes on your Windows 10 PC, you might run issues if you aren't connecting properly to the internet. If you've come across a potential fix that involves opening a certain port in your firewall, you might be wondering what exactly that process entails. This is a problem that can arise in plenty of situations, but especially when attempting to set up a VPN. If you suspect Windows Firewall is part of your connectivity issue, here's how to open ports.
How to open a port for incoming traffic in Windows Firewall
Windows Firewall is designed as a security measure for your PC. To put it simply, a firewall analyzes incoming and outgoing connections to determine whether or not they're threats. If you suspect that your Windows Firewall is causing connectivity issues, you can open a port for incoming traffic. Here's how:
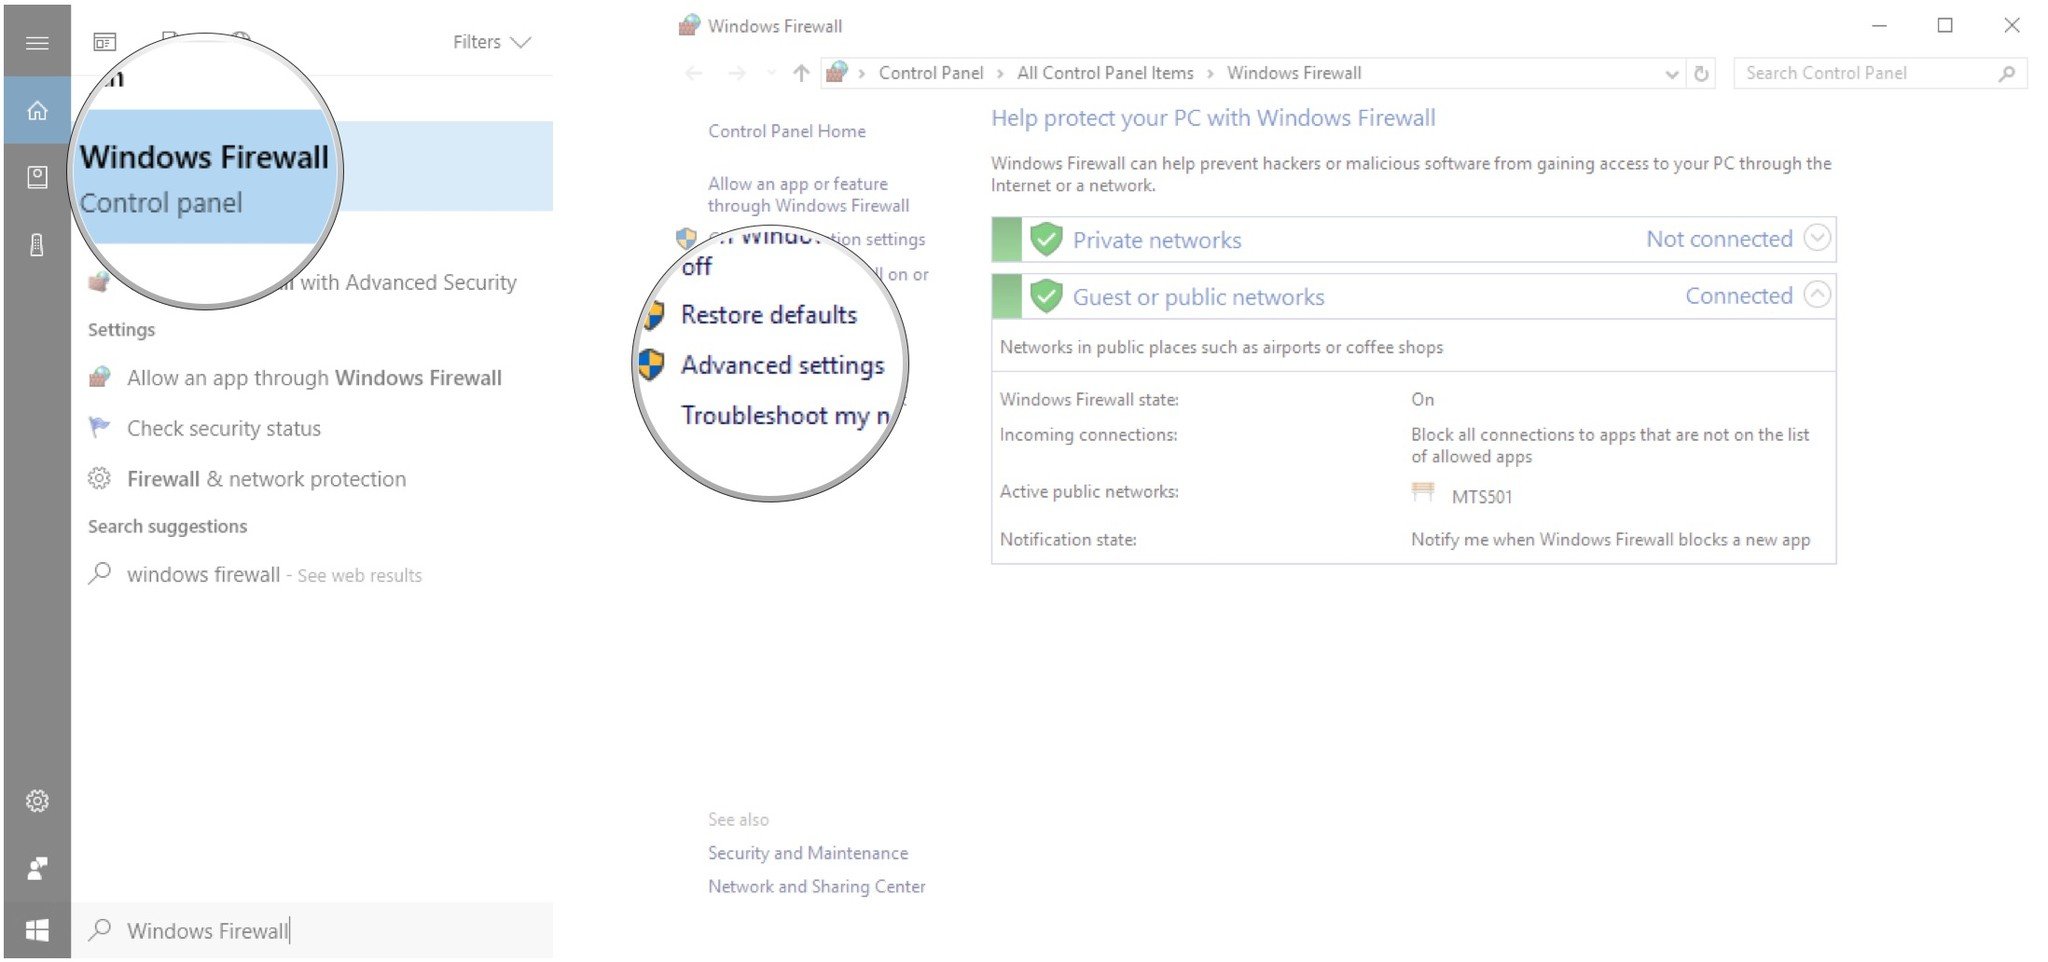
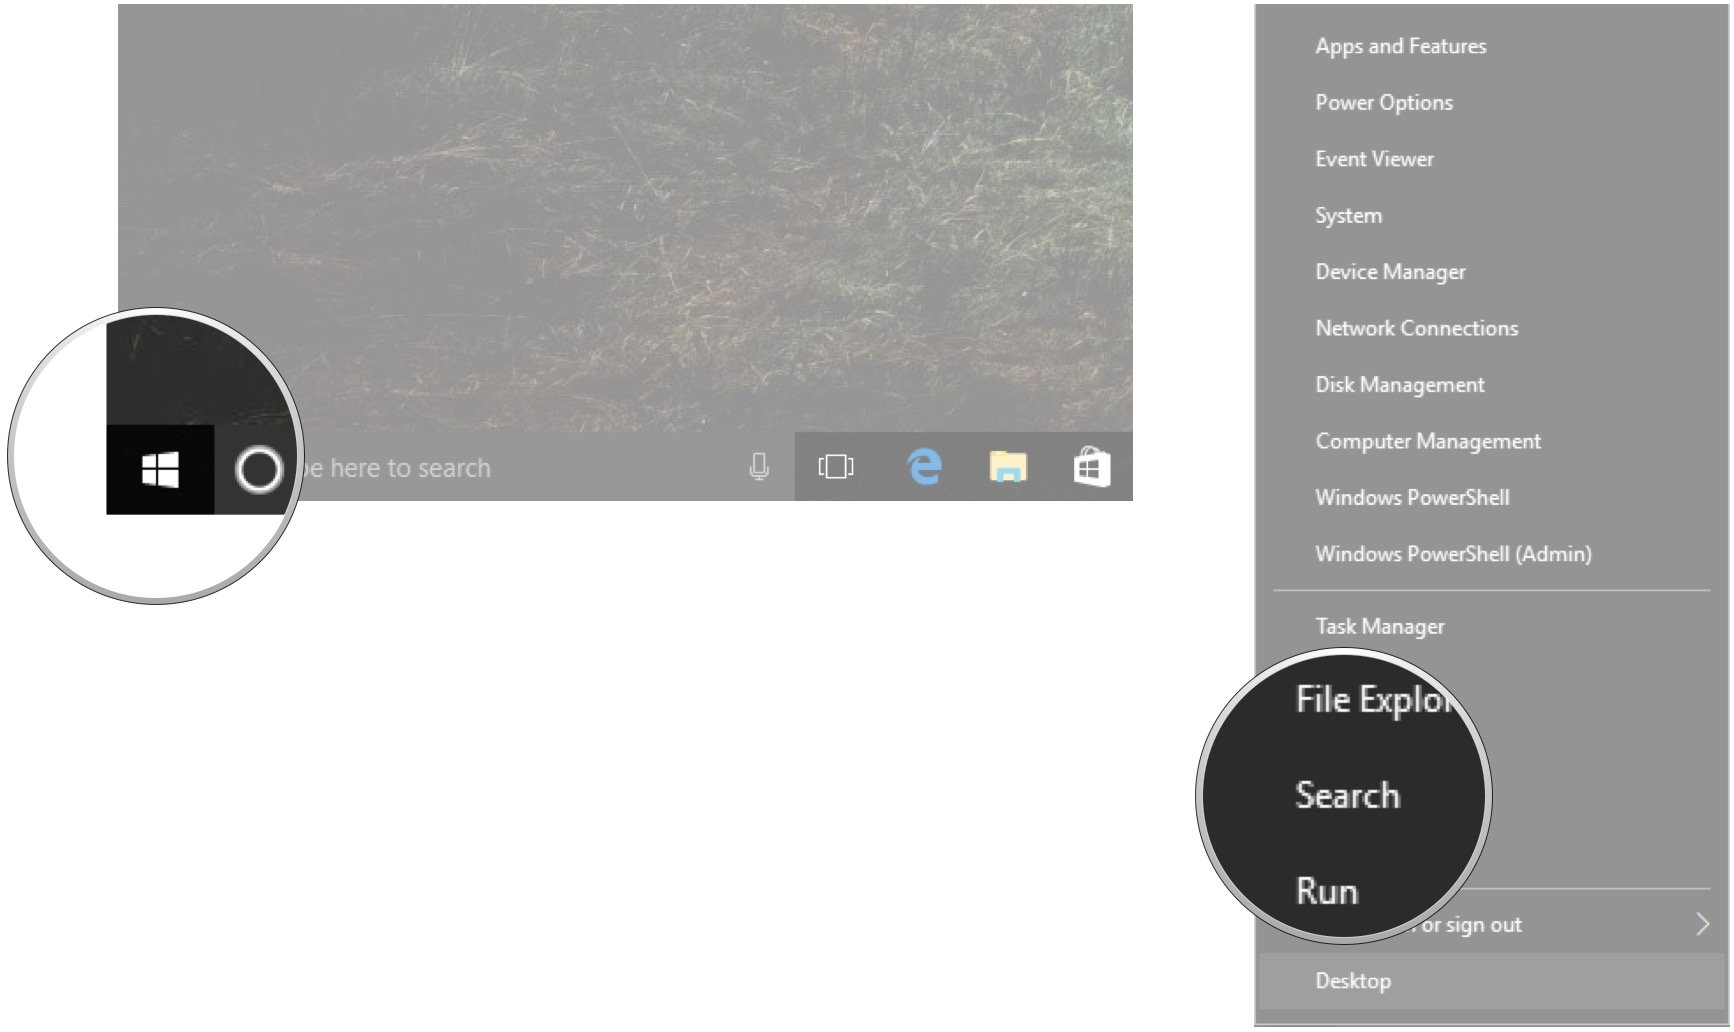
- Right-click the Start button.
- Click Search.
-
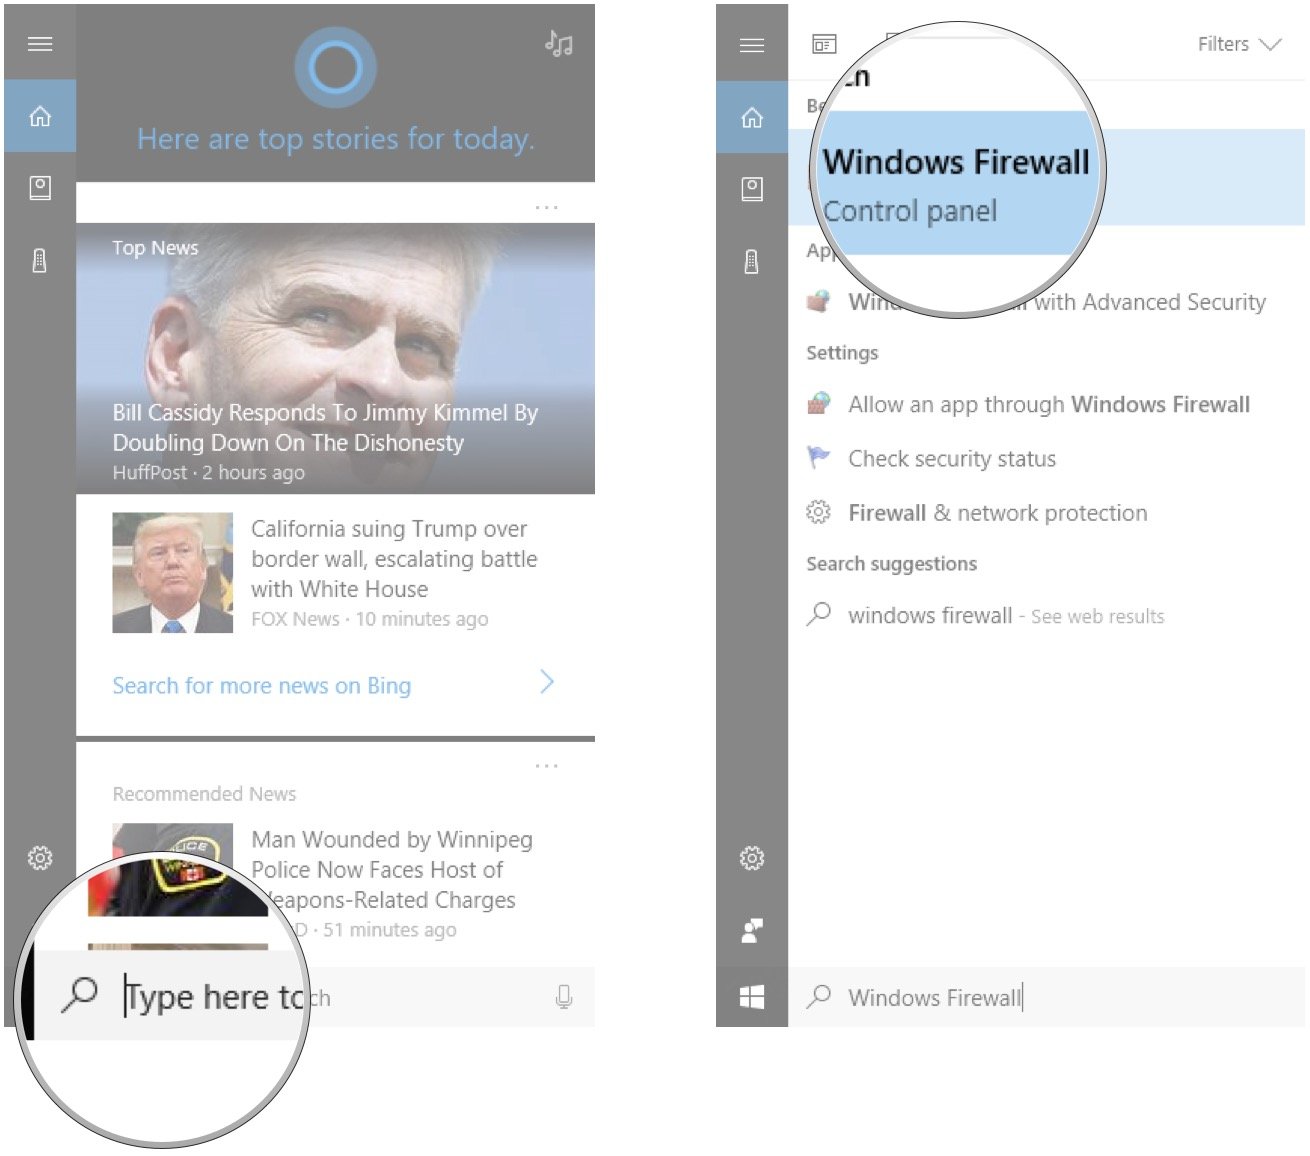
Type Windows Firewall.

- Click Windows Firewall.
-
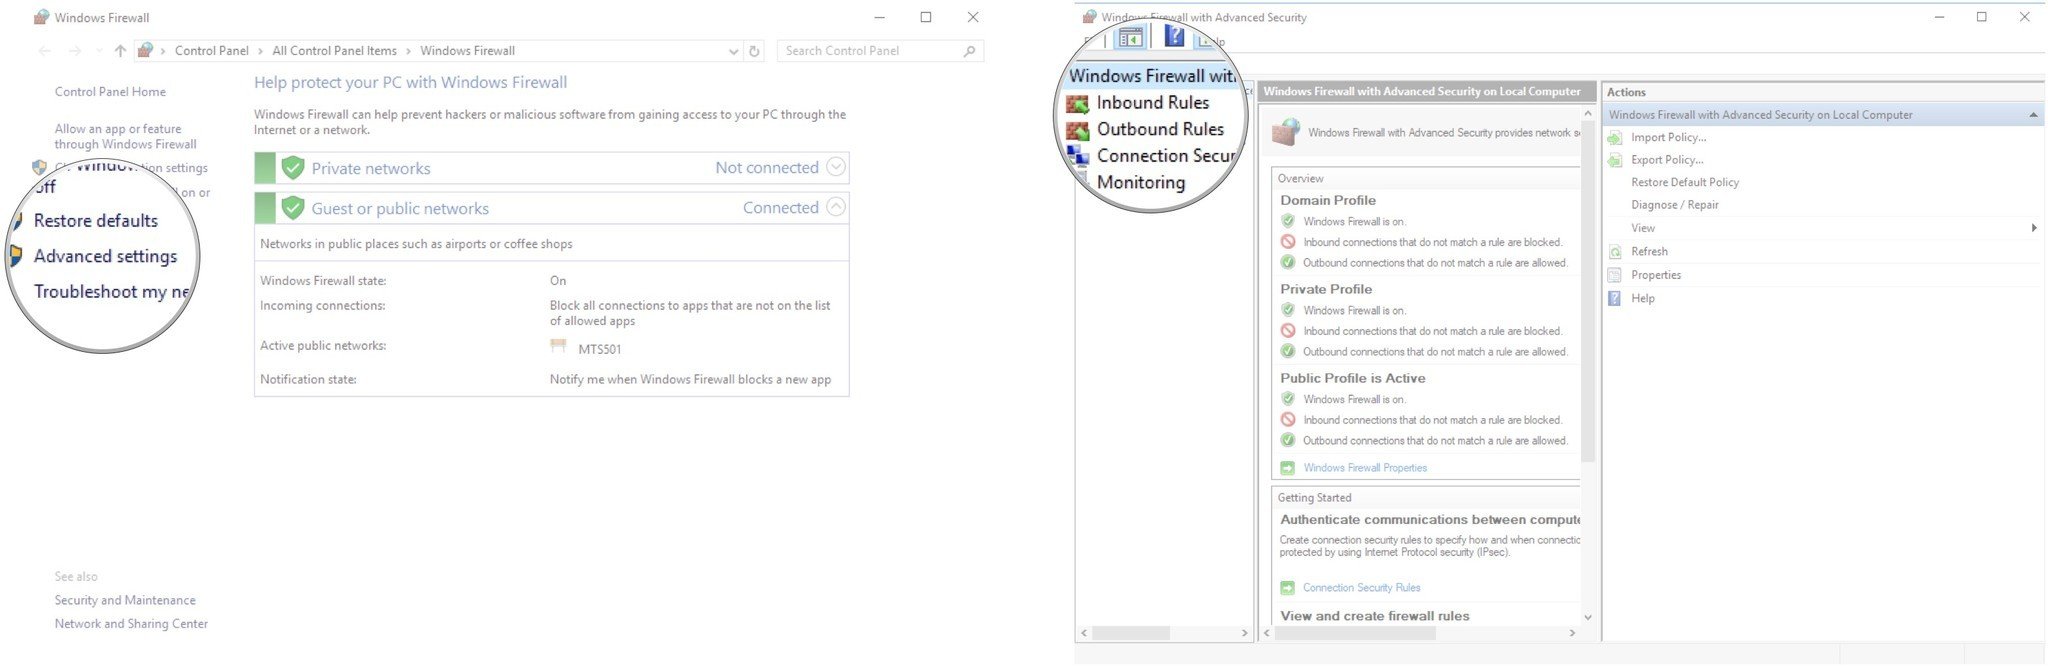
Click Advanced settings.
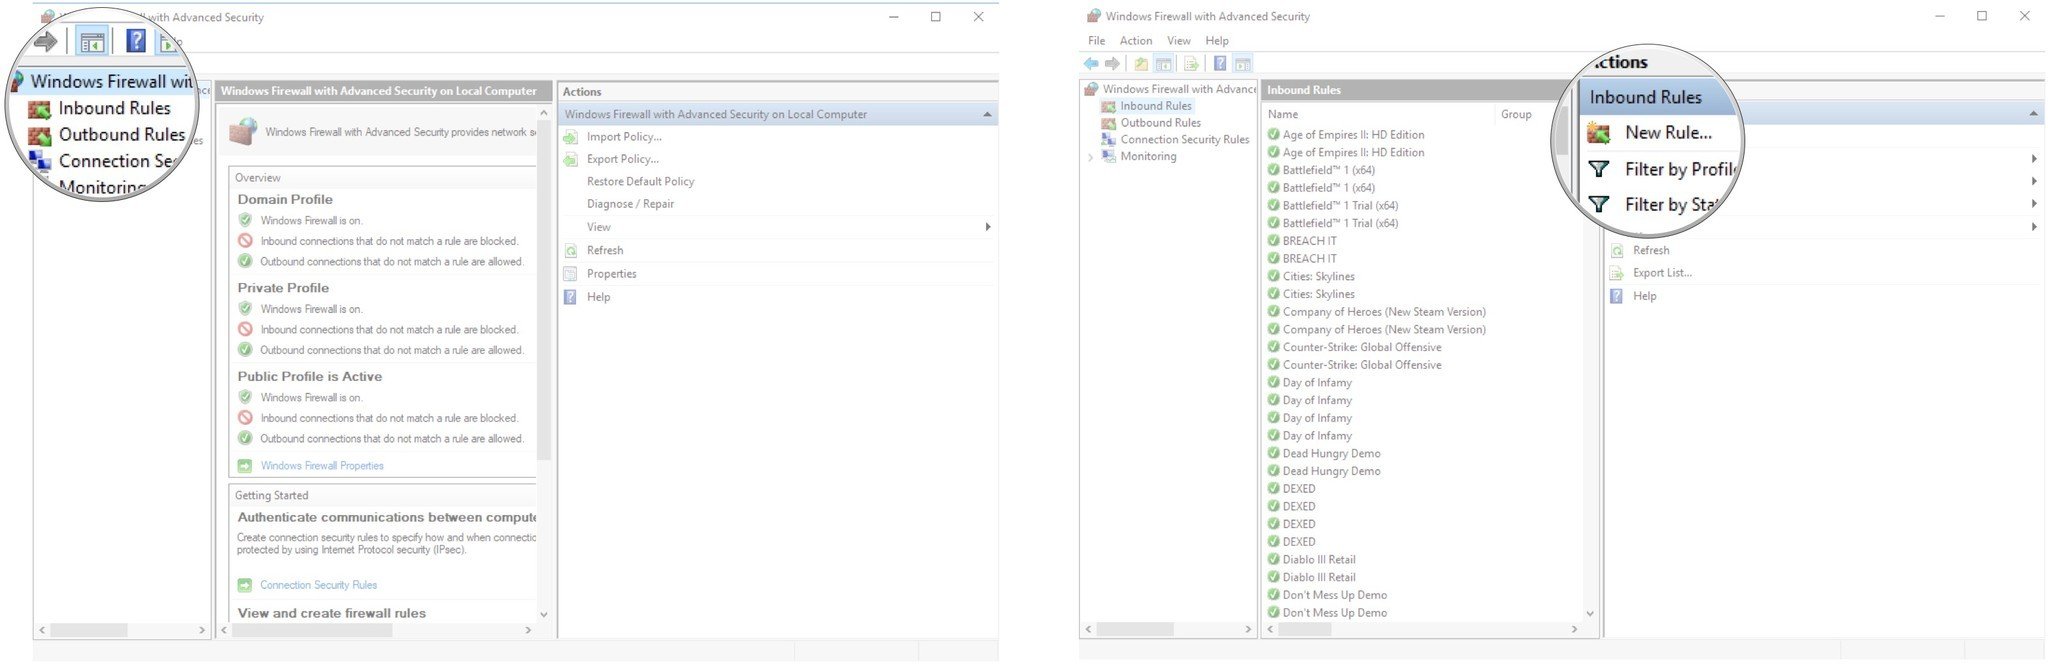
- Click Inbound Rules in the left frame of the window.
-
Click New Rule… in the right frame of the window.
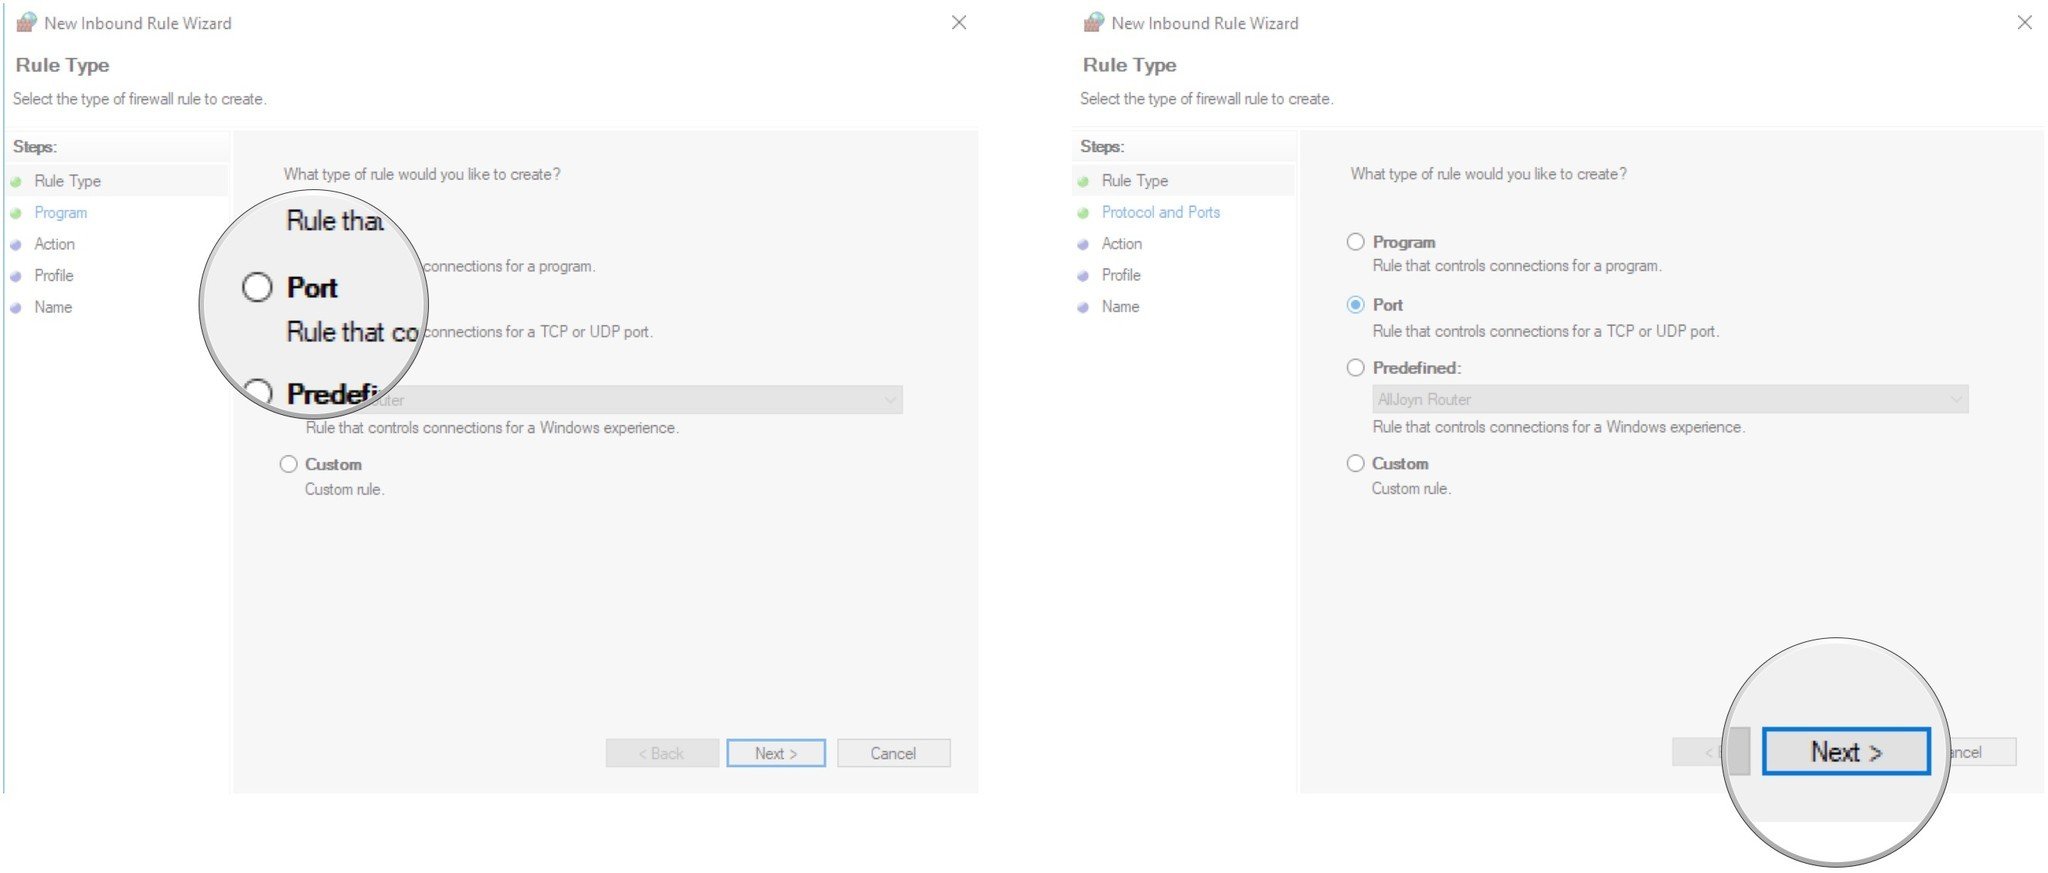
- Click Port.
-
Click Next.
- Click either TCP or UDP.
-
Click Specific local ports.

- Type a port number. (In this case, we will open port 1707.)
-
Click Next.

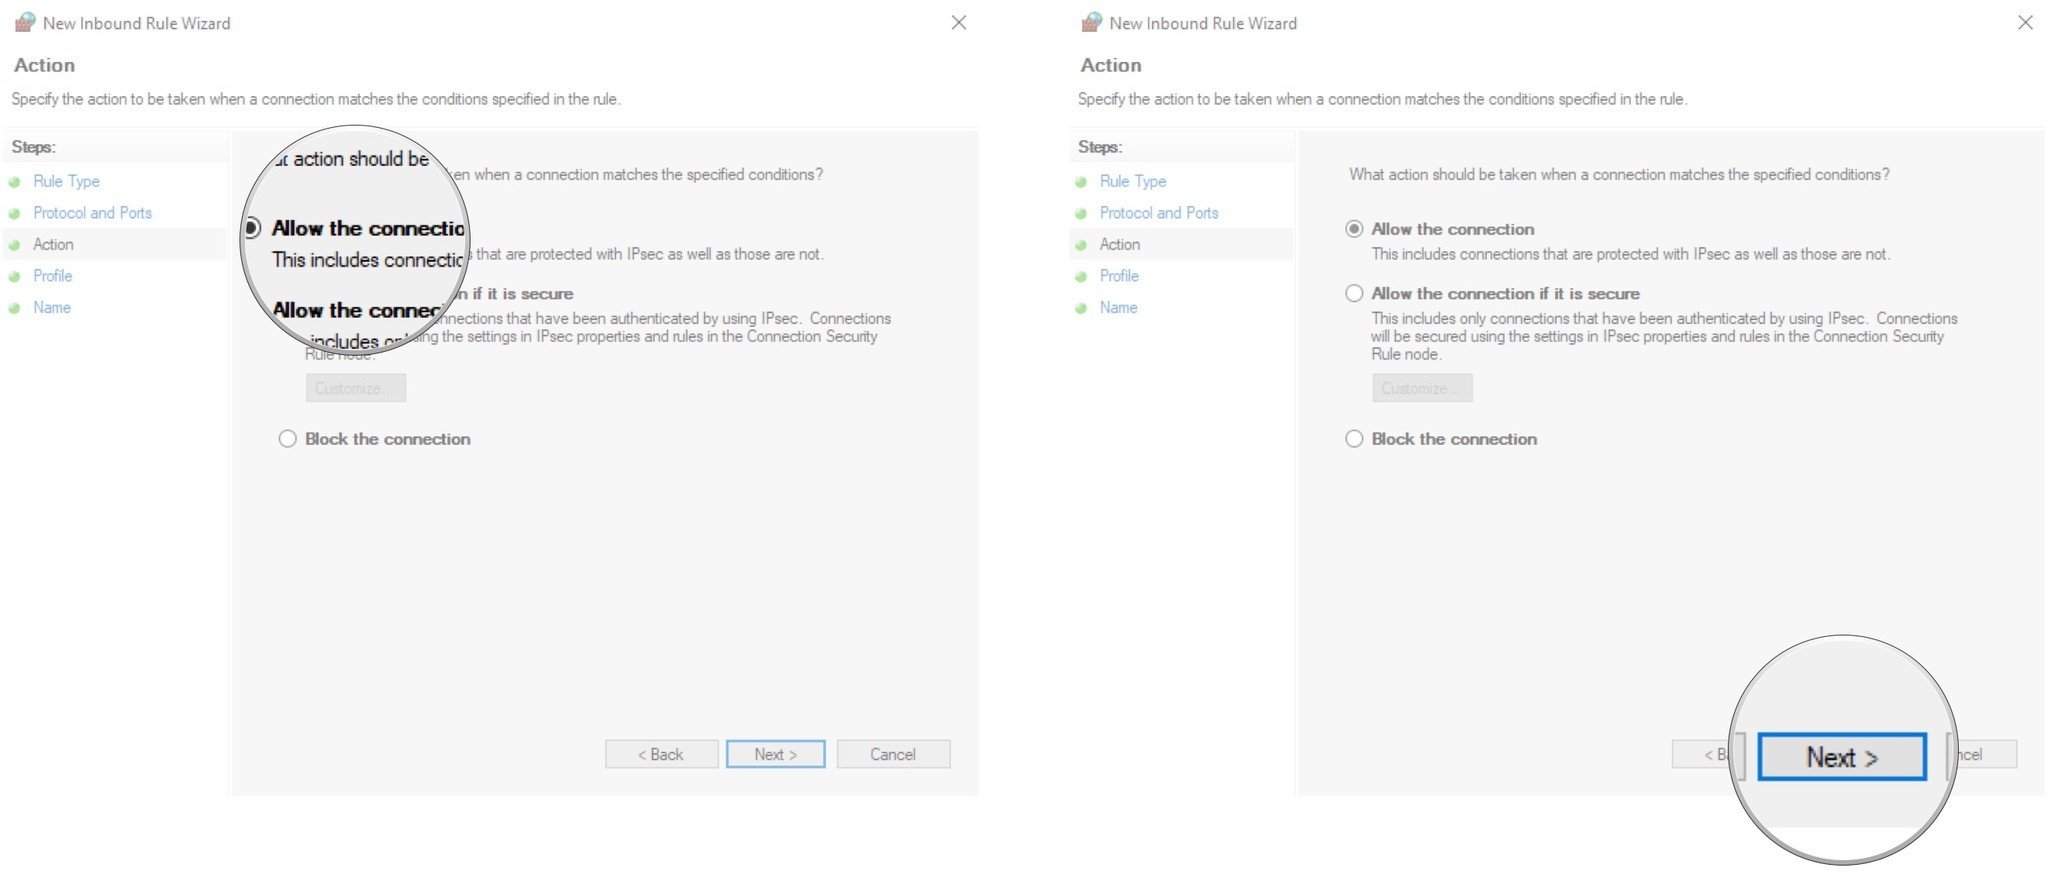
- Click Allow the connection.
-
Click Next.
- Click any network types you'd like to allow the connection over.
-
Click Next.

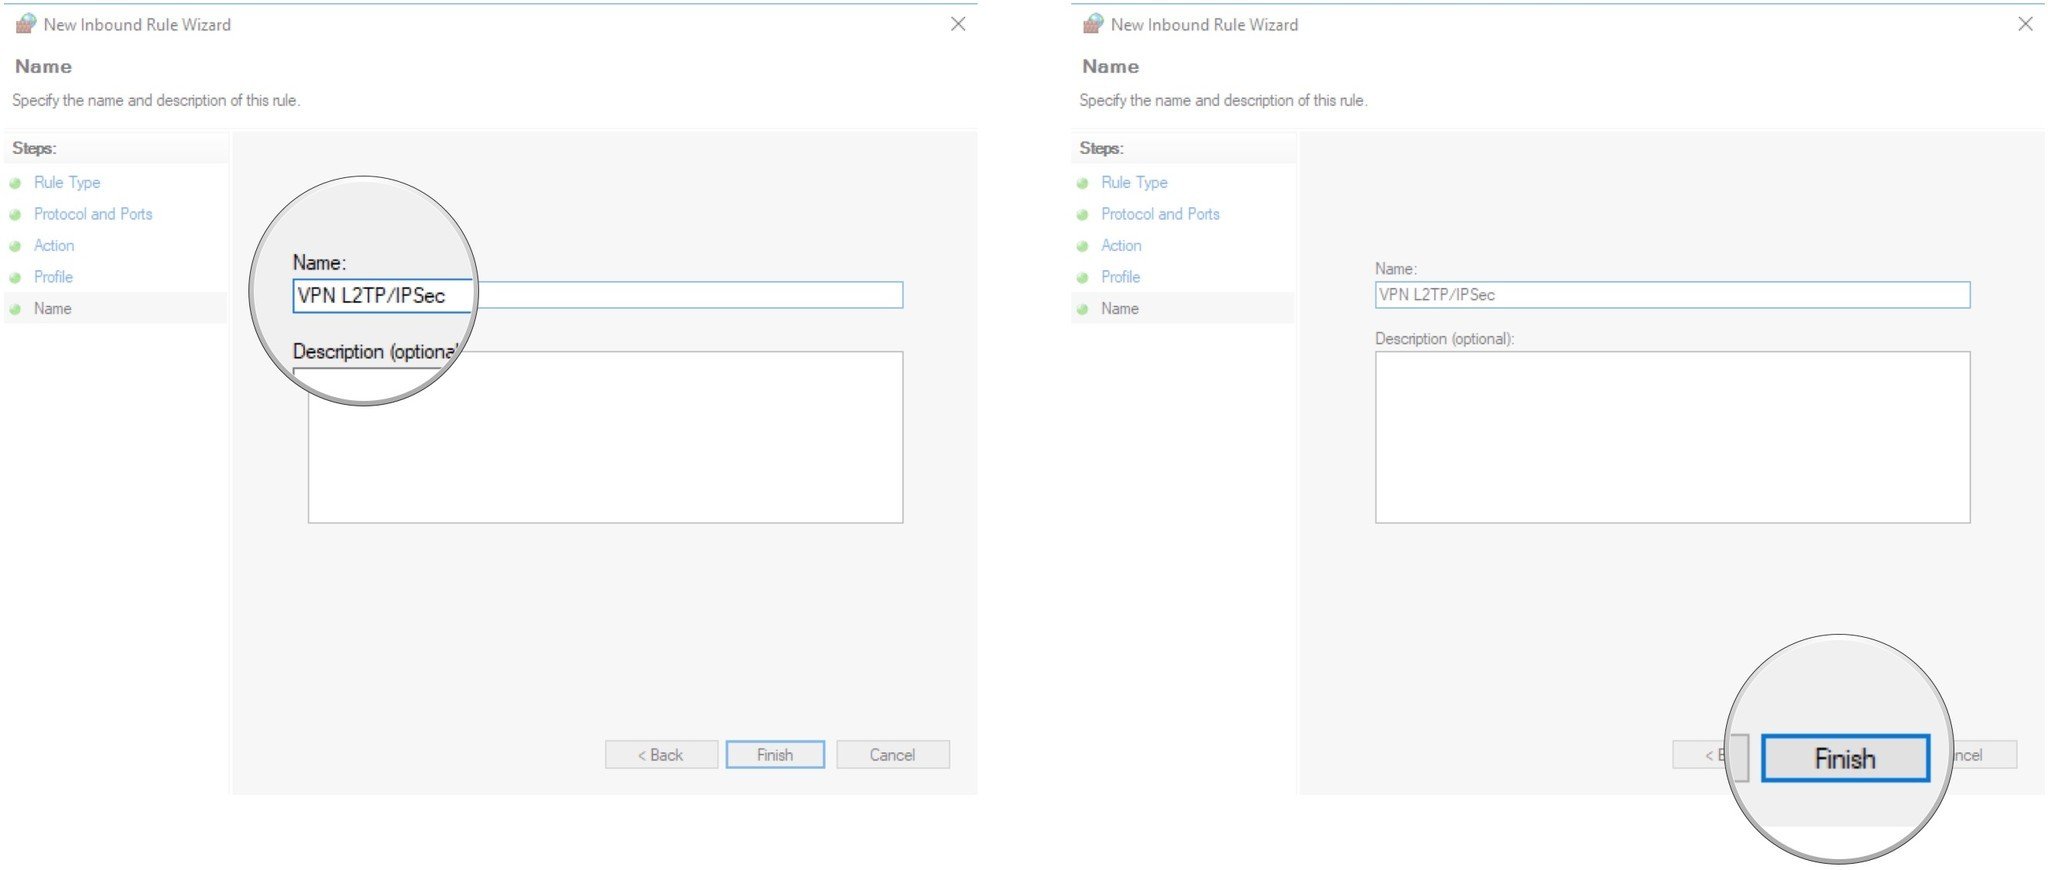
- Type a name for the rule.
-
Click Finish.


How to open a port for outgoing traffic in Windows Firewall
The same set of steps listed above can be used to create a rule for outgoing traffic. In step No. 6, instead of clicking Inbound Rules, you'll want to click Outgoing Rules. The rest of the steps are the same, and you can disable the rule in the same manner by using the steps in the next section.
How to close a port in Windows Firewall
Want to disable the rule you created to open a port in the Windows Firewall? Here's how:
- Right-click the Start button.
-
Click Search.
- Type Windows Firewall.
-
Click Windows Firewall.
- Click Advanced settings.
-
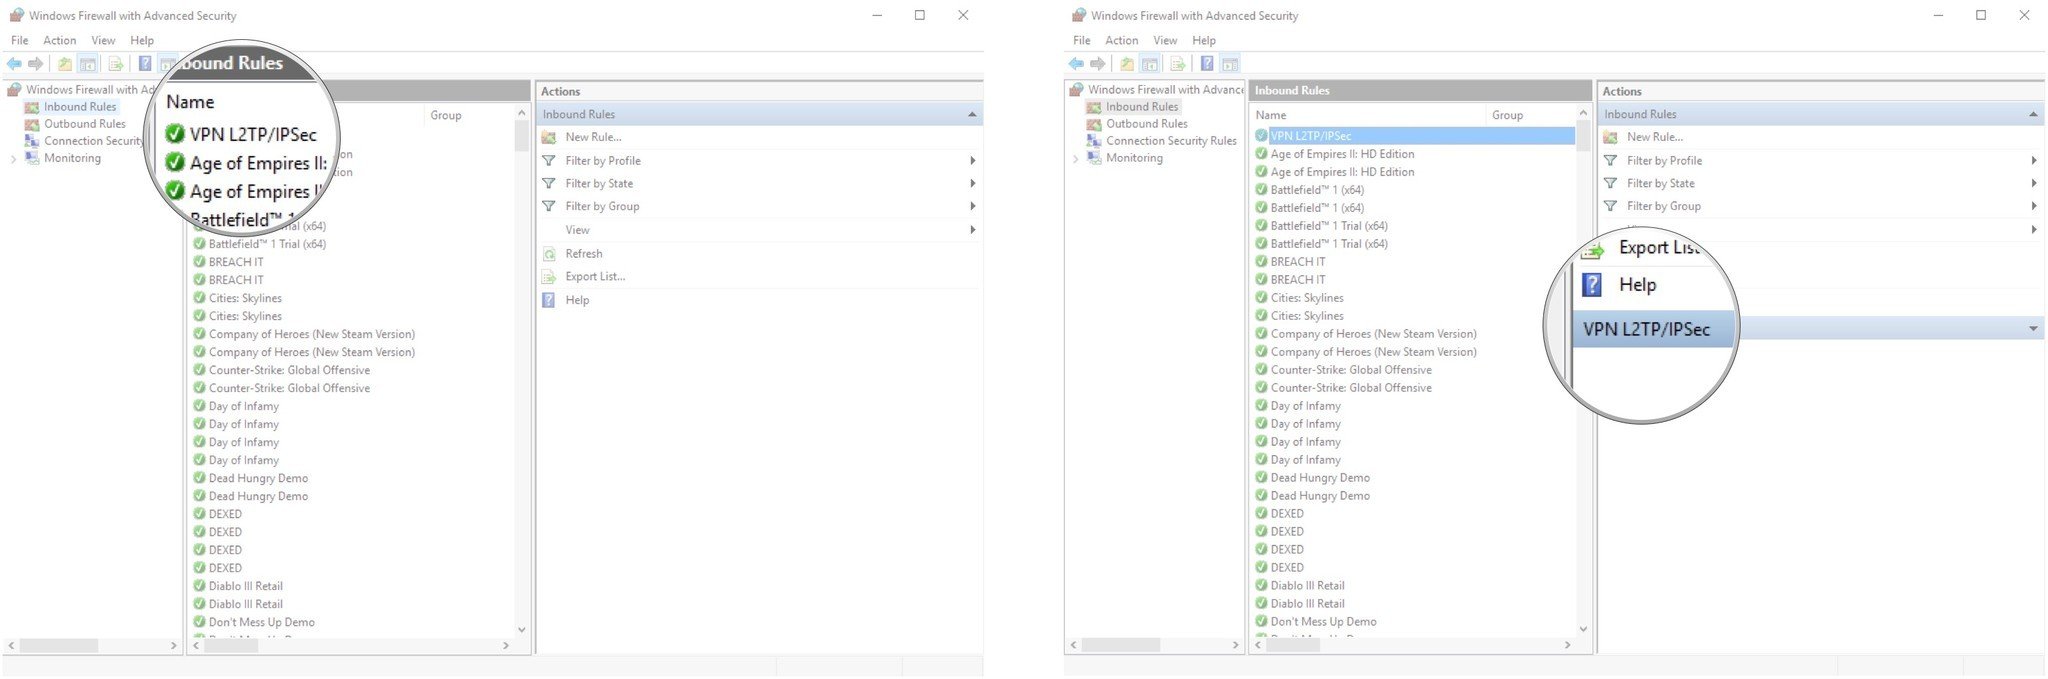
Click Inbound Rules or Outbound Rules in the left frame of the window, depending on what type of rule you created.
- Click the rule you created.
-
Click the name of the rule in the right frame of the window.
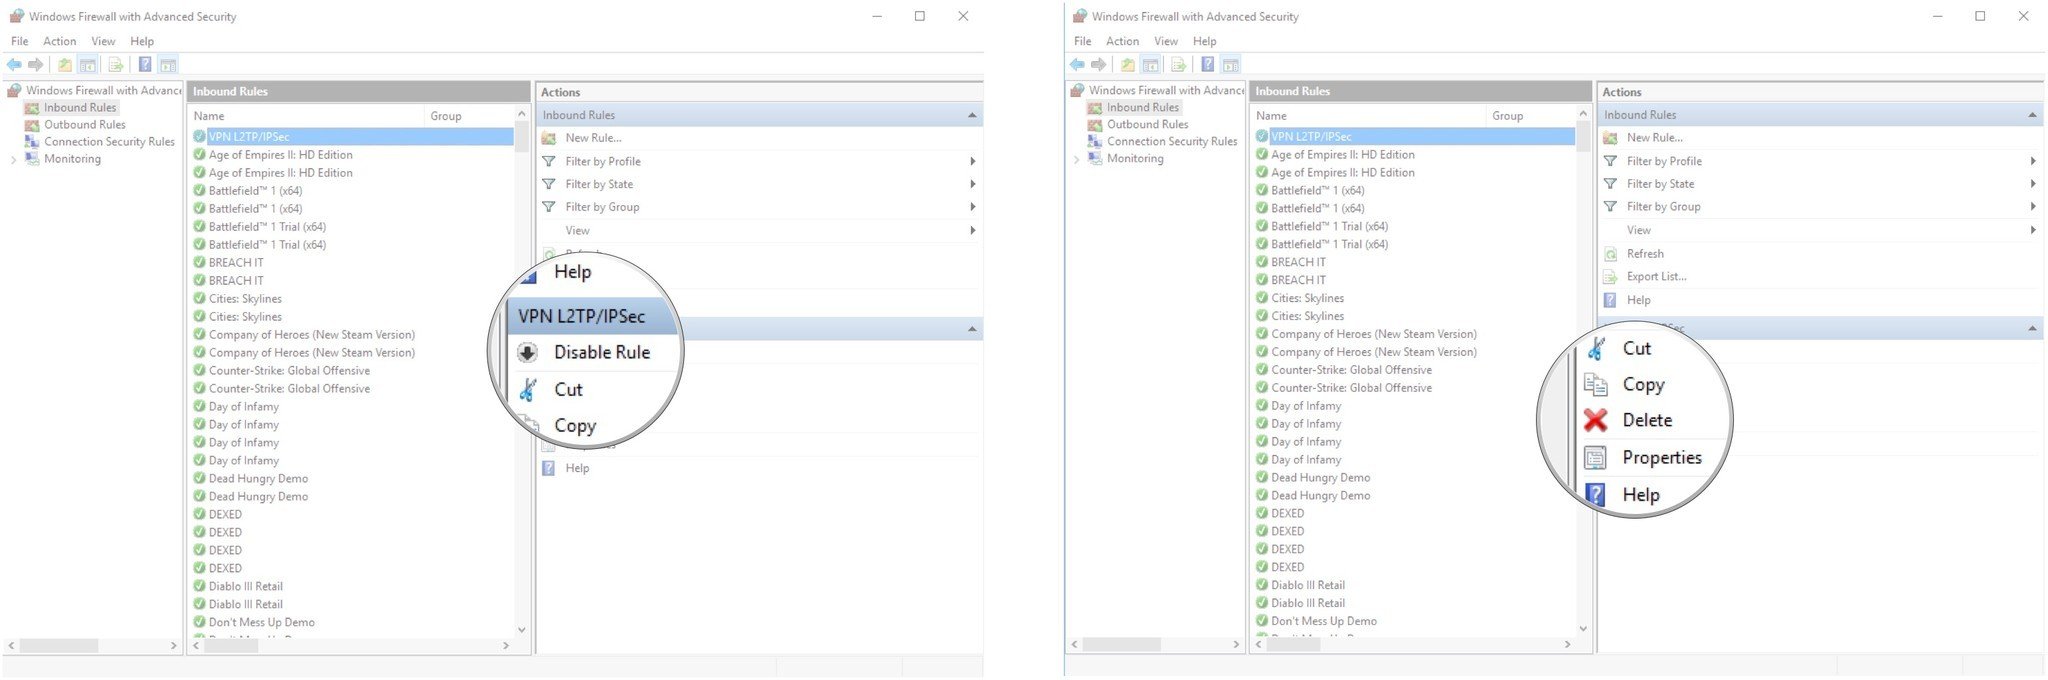
- Click Disable Rule.
-
Click Delete if you want to completely delete the rule.


More resources
Need a bit more help with Windows Firewall and Windows 10? We have plenty of resources covering a wide range of topics.
- How to troubleshoot and fix Windows Firewall problems
- What you need to know about the new Windows Defender Security Center in the Creators Update
- Windows 10 help, tips, and tricks

Save on Xbox gear
Best Cyber Monday Xbox Series X deals 2021
Stock of the Xbox Series X will still be hard to find on Cyber Monday but there will be plenty of other items on offer. We're expecting big reductions on some top-of-the-line gaming headsets and if you've been looking to upgrade your storage there will be SSD and HDD offers galore. Controllers, Game Pass, and even TVs all feature too.
How to Check Available Ports in Windows 10
Source: https://www.windowscentral.com/how-open-port-windows-firewall